Here are our top tips of how to install Outlook client for Version 9. We hope it helps to get more from your Microsoft Dynamics 365 Outlook link.
Looking for other tips, tricks or how tos? Contact us and see if we can help. enquiries@caltech.co.uk
Firstly, open up the Microsoft download for the Microsoft Dynamics 365 Outlook client.
After you’ve opened the link, select ‘Download’. This will show two different versions of the outlook client that needs to be installed.
The two versions are for the 32- and 64-bit versions of Microsoft Outlook. To find out the version of the users’ Outlook then navigate to Outlook. Select File > Office Account > About Outlook. At the top it will show which version of Outlook is installed like below.
After the Outlook version has been discovered, go back to the link and select the version you will like to download. The version ending in amd64.exe is for the 64bit version and the i386.exe is for the 32bit version. Tick which version is needed then press Next.
The download will then start, after the download has finished run the download and the wizard will appear. The first part will be to insert it into a folder. For the outlook client, I would access the local drive on the computer, most likely the C drive and create a new folder called ‘Dynamics Outlook V9’. Then insert the download into that folder by selecting the folder and press ‘OK’.
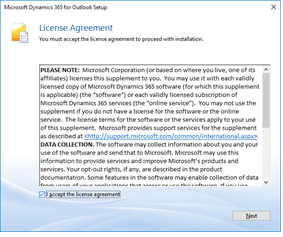
After inserting the download into the folder, it will ask you to accept the terms and conditions, accept these conditions.
After the conditions have been accepted, another prompt will appear like below. Select Install Now. This might take a couple of minutes to install.
When the download is complete, it might ask which organization to connect to. Insert the URL of the company’s CRM URL. For example: https://companyname.crm4.dynamics.com. If the configuration wizard doesn’t appear then press start > type in ‘Configuration Wizard’ then select the program then add the organisation’s CRM URL. When it’s connected to the organisation, it will ask for a username and password.
Insert the CRM username and password of the user when the organisation is connected. After it has synched the organisation to Outlook, it will allow the user to track and set regard emails.
Looking for other tips and tricks? See our other helpful blog posts.
Looking for Dynamics 365 support? contact enquiries@caltech.co.uk
Information correct at time of publishing. Please take all necessary steps to ascertain that information you use is correct. Steps carried out at users risk.